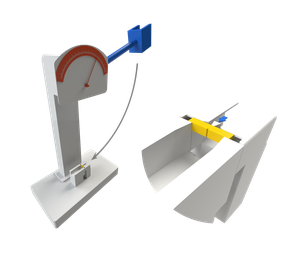
Charpy test setup
Features:
- In-house machined samples in accordance with standard ASTM A370:
- Standard dimensions: 55 mm x 10 mm x 10 mm
- Minimum dimensions: 55 mm x 10 mm x 2.5 mm
- Common practice V-notch, but also U-shaped, keyway… notches are possible
- Impact energy up to 400 J
- Testing temperatures ranging from -20 °C to 20 °C.
Application:
- Determine toughness of metals, plastics and composites.
- Impact testing at different temperatures to capture ductile-to-brittle behaviour.
- Girth weld analysis with notch applied in weld metal center (WMC), heat-affected-zone (HAZ) and base material (BM).
- Three repeat tests are conducted for every configuration (temperature, notch location and orientation) in order to have statistically sound results.
Working principle:
A Charpy impact test is a dynamic test in which a notched specimen is struck and broken by a single blow of a freely swinging pendulum. The difference in height of the upward swing of the pendulum is used to determine the absorbed energy in the fracture event.
Reported data:
For each specimen, the following data is reported:
- the specimen thickness [mm];
- the net cross sectional area, An [mm²];
- the test temperature [°C];
- the absorbed Charpy V impact energy [J];
- the percentage shear fracture [%], determined following ASTM E 23;
- the lateral expansion [mm], determined following ASTM E 23.
