LECO LV-100-AT automatic hardness tester
Features
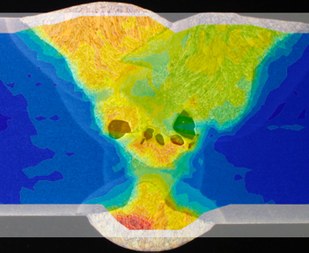
A large number of indents can be applied on the entire sample to get a complete hardness map rather than a local measurement value at one location or on a specific line.
- Indentation force ranging from 0.3 to 30 kgf.
- Number of indents ranging from 1 to more than 1000 indents per sample.
Application:
- Local hardness measurement of raw metals.
- Hardness mapping of welds.
- Hardness mapping of components to evaluate treatments/coatings/wear resistance.
Working principle:
A hardness test is performed by pressing a hard object (indenter) into the test material. The Vickers hardness value is achieved by measuring the area of the mark left by a pyramidal shaped, diamond indenter in accordance with standard ASTM E92 and ASTM E384.
